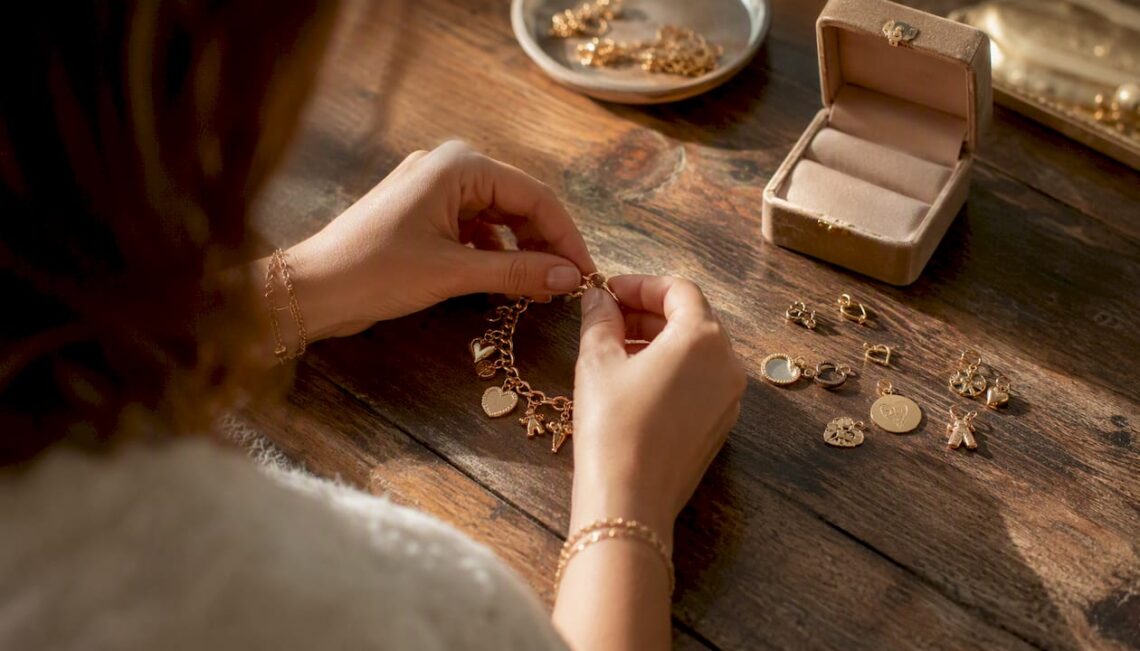
How to Build a Meaningful Charm Bracelet Step by Step
The most meaningful charm bracelets start with a story, not a shopping cart. Choose a personal theme first, select a durable base chain, attach several charms that genuinely represent something in your life, and build slowly from there. That single principle separates a bracelet you treasure for decades from one you forget in a drawer.
Your starter checklist:
- A base chain (curb, cable, or oval link; sized appropriately for most adult wrists)
- Several charms tied to a clear personal theme
- Two pairs of flat-nose or chain-nose pliers
- A small assortment of 4–5 mm, 20-gauge jump rings
- A soft polishing cloth and a storage pouch
The sections below walk you through every decision in order, from picking your story to the final pull-test before you wear it.
Key Takeaways
A meaningful charm bracelet starts with a personal theme and a durable base chain, then grows one intentional charm at a time.
| Point | Details |
|---|---|
| Story first, charms second | Choose your theme before shopping to keep the bracelet cohesive as it grows. |
| Start with 3–6 charms | This count gives visual interest while leaving room for the collection to expand naturally. |
| Match hardware to charm weight | Use 4–5 mm, 20-gauge jump rings for standard charms; split rings or soldered loops for irreplaceable pieces. |
| Size with charm bulk in mind | Add a small length allowance to your wrist measurement when planning a heavy charm cluster. |
| Usajewels for custom builds | Usajewels offers in-house, ethically sourced custom jewelry for readers ready to commission a finished piece. |
Table of Contents
- What does a meaningful charm bracelet building guide actually cover?
- What materials and tools do you need before you start?
- How do you choose a theme so your bracelet tells a real story?
- How do you select the right base chain for your bracelet?
- How do you choose charms that are actually meaningful?
- What design principles keep a charm bracelet balanced?
- Which attachment hardware should you use, and when?
- Step-by-step assembly: how do you attach charms and finish the bracelet?
- How do you measure your wrist and choose the right bracelet length?
- How do you care for a charm bracelet over time?
- What do experienced jewelers recommend for heirloom-quality results?
- Why storytelling matters more than the charms themselves
- Ready for a custom charm bracelet made to last a lifetime?
- Sources
- FAQ
What does a meaningful charm bracelet building guide actually cover?
A meaningful charm bracelet building guide is really a personal narrative plan with hardware attached. The Jewelers Mutual Group describes charm bracelets as personal, evolving pieces that blend meaning, creativity, and storytelling best when built slowly around a theme. That framing matters because it changes how you shop: you are curating a story, not filling a chain.
What materials and tools do you need before you start?
Gathering everything before you sit down saves real frustration. Here is a complete list organized by category.
Materials:
- Base chain (curb, cable/belcher, or oval link; 7–7.5 inches standard)
- Charms (3–6 to start; 6–15 mm range works for most bases)
- Open jump rings (4–5 mm diameter, 20-gauge wire is a reliable starting point per Halstead’s attachment guide)
- Split rings (for heavier charms that need extra security)
- Lobster clasp or spring-ring clasp (matched to chain weight)
- Soldering supplies or access to a jeweler (for heirloom-grade closures)
Tools:
- Two pairs of flat-nose or chain-nose pliers (one to hold, one to twist)
- Split-ring pliers (the hooked tip makes opening split rings painless)
- Flush cutters (for trimming wire ends cleanly)
- Soft polishing cloth (microfiber or jeweler’s rouge cloth)
- Small zippered storage pouch (keeps loose charms from rolling away mid-build)
Pro Tip: If you plan to mix gold and silver finishes, buy jump rings in both metals from the start. Mismatched jump ring metal is one of the most common visual mistakes and the easiest to prevent.
How do you choose a theme so your bracelet tells a real story?
Before you buy a single charm, answer these three questions:
- What three moments, places, or people define who you are right now?
- Which of those do you want to carry with you every day?
- Is there one “north-star” charm that anchors the whole story?
A storytelling-first approach reduces impulse picks and keeps the collection cohesive as it grows. Here are three concrete theme paths with matching couple socks gift ideas that can inspire your charm choices:
Milestones theme: graduation cap, baby footprint, wedding ring, key (first home), diploma scroll. This works well as a single-narrative bracelet because each charm marks a specific date you can name.
Travel theme: miniature Eiffel Tower, compass rose, airplane, state outline, passport stamp disc. The bracelet becomes a physical map of where you have been, and each charm carries a memory attached to a place.
Family theme: birthstone charms for each family member, initial discs, a heart locket, a family tree charm. Mixing birthstones and initials creates a layered visual even when the charms are small.
Mixing two themes is fine, but commit to a finish family (all gold-tone or all silver-tone) so the bracelet reads as one piece rather than two separate collections sharing a chain. Deciding on a central theme before selecting charms is the single most consistent advice across experienced charm builders.
How do you select the right base chain for your bracelet?
The base chain determines how many charms you can carry, how the bracelet sits on your wrist, and how long it lasts. A light, delicate chain can distort as weight accumulates. Sayers London recommends choosing a slightly heavier base chain than you initially think you need so the chain retains its shape over time.
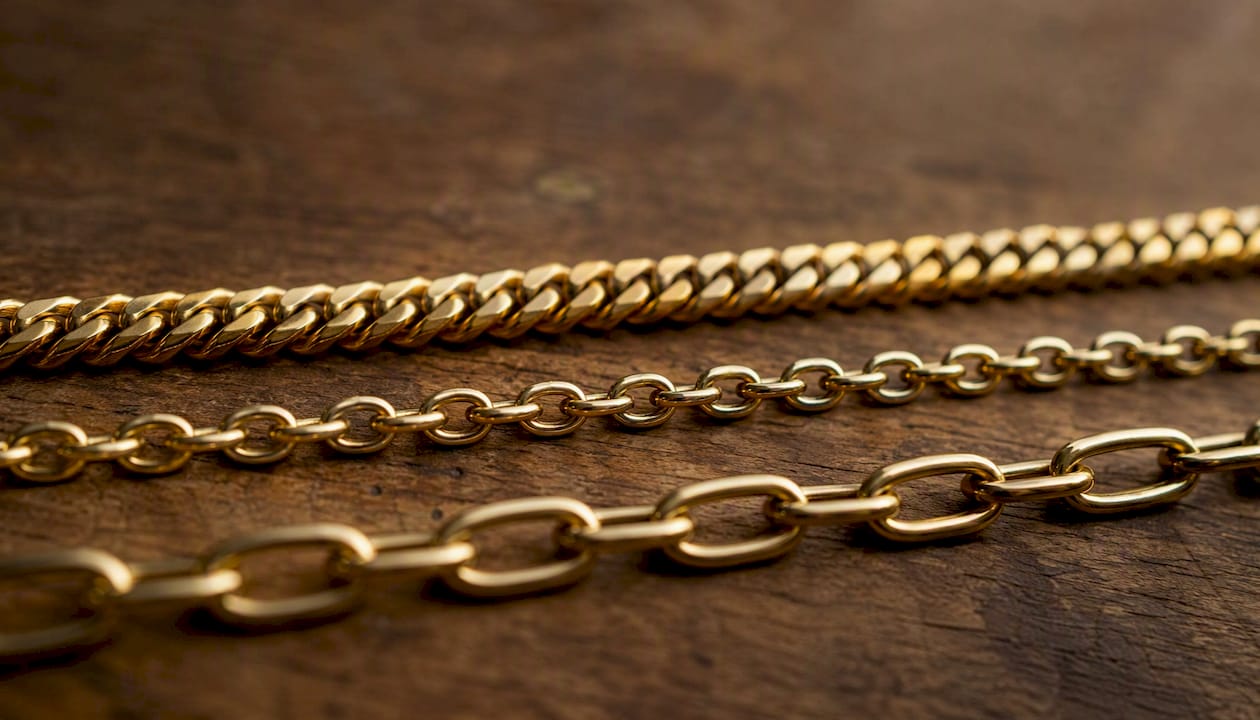
| Chain type | Link width range | Best for | Clasp match |
|---|---|---|---|
| Curb chain | 3–5 mm | Heavy charm loads, everyday wear | Lobster clasp |
| Cable/belcher | 2–4 mm | Lightweight to medium charms | Spring-ring or lobster |
| Oval link | 3–5 mm | Mixed-weight loads, classic look | Lobster clasp |
Link width matters for attachment: chains with links in the 2–5 mm range accept standard 4–5 mm jump rings without forcing or gaps.
Metal choices at a glance:
- Sterling silver: bright, affordable, requires occasional polishing; tarnishes with exposure to chlorine
- 14k or 18k gold: durable, low-maintenance, pairs naturally with gold-tone charms; higher upfront cost
- Gold vermeil: sterling silver base with gold plating; beautiful but the plating wears over time with daily use
- Stainless steel: extremely durable and tarnish-resistant; harder to resize or solder
For guidance on chain types and thickness, Usajewels’s chain education page covers the differences in detail.
How do you choose charms that are actually meaningful?
Charm selection is where the personal narrative becomes physical. Standard charm sizes run 6–15 mm; charms above that range can feel unwieldy on a bracelet, and very small charms below 6 mm may require custom jump ring measurements to attach securely.
Charm categories and their symbolic uses:
- Travel: destination landmarks, compass, airplane, globe
- Milestones: graduation cap, diploma, baby shoe, anniversary disc
- Love and family: heart, infinity knot, birthstone, initial disc
- Hobbies: musical note, paintbrush, book, bicycle, camera
- Luck and protection: four-leaf clover, horseshoe, evil eye, hamsa
- Personality: zodiac sign, spirit animal, favorite flower, meaningful number
Start with several charms. This gives immediate visual interest without overcrowding the chain, and it leaves room for the bracelet to grow as your story does. Leaving open links between charms is not a flaw; it is an invitation.
Pro Tip: When mixing metals, keep the finish family consistent. High-polish gold with high-polish silver reads as intentional. High-polish gold next to brushed silver reads as accidental. The mixing metals guide at Usajewels walks through this in practical terms.
What design principles keep a charm bracelet balanced?
A bracelet that looks good flat on a table often twists uncomfortably on the wrist. Balance is both visual and physical.
Four layout frameworks from Atlanta Findings’ charm style guide give non-designers a reliable starting point:
- Solo statement: one large focal charm centered on the bracelet, smaller supporting charms flanking it
- Center cluster: three to five charms grouped at the center front, open chain on either side
- Spaced layering: charms distributed at even intervals around the full chain
- Stacked layering: multiple bracelets worn together, each with its own theme
Before you attach anything permanently, lay the chain flat on a table and arrange charms in your planned order. Place heavier charms toward the center of the bracelet’s front arc. If you cluster all the weight on one side, the bracelet rotates and the charms end up on the underside of your wrist within an hour of wearing.
Use contrast deliberately: alternate a larger charm with a smaller one, or a textured charm with a smooth disc. That rhythm keeps the eye moving and prevents the bracelet from reading as a single dense block. For asymmetrical layouts, anchor one end with a focal charm and let the opposite end trail into smaller, lighter pieces.
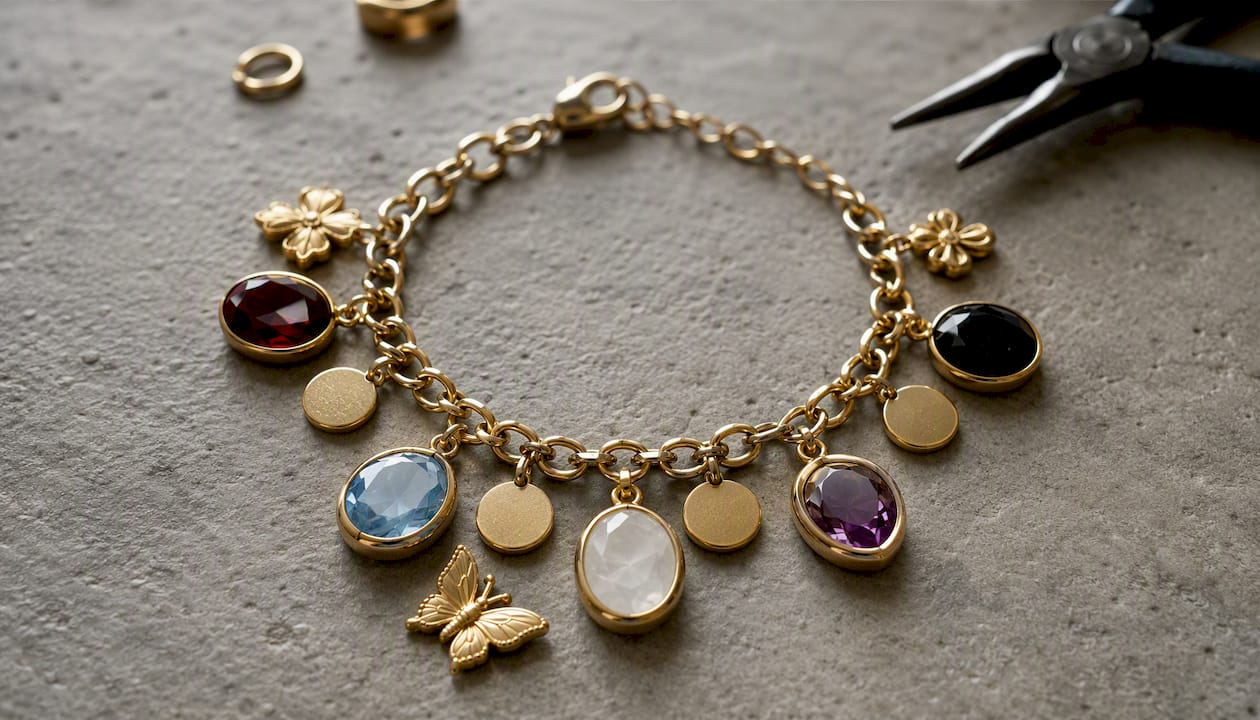
Sketch your layout on paper or photograph the flat arrangement before you pick up the pliers. That photograph is your reference if a charm shifts during assembly.
Which attachment hardware should you use, and when?
The hardware you choose determines whether a charm stays on for decades or falls off in a month.
- Open jump rings: the most common attachment; easy to open and close with two pliers. Use for lightweight to medium charms on everyday bracelets. A 4–5 mm diameter, 20-gauge ring handles most standard charms.
- Split rings: look like tiny key rings; much harder to open accidentally. Use for heavier charms or any charm you cannot afford to lose. Split-ring pliers make opening them manageable.
- Soldered loops: the most secure option; the loop is permanently closed. Use for irreplaceable or heirloom charms. This requires a jeweler unless you have soldering experience.
- Clip-on bails: slide directly onto the chain without a separate ring. Convenient but limited to chains with the right link profile.
Pro Tip: Match the inner diameter (ID) of the jump ring to the charm’s bail loop. A ring that is too large lets the charm spin and migrate; one that is too small stresses the metal when you open it. Keep a small assortment of sizes on hand because charm bail sizes vary by manufacturer.
Safe jump ring technique (step checklist):
- Hold the jump ring with two pairs of pliers, one on each side of the cut.
- Twist one side toward you and one side away — never pull the ring open sideways, which distorts the circle.
- Thread the charm bail and the chain link onto the open ring.
- Twist back to closed, applying slight over-pressure so the ends meet flush.
- Run a fingernail across the seam to confirm there is no gap.
Step-by-step assembly: how do you attach charms and finish the bracelet?
Follow these steps in order. Skipping the prep steps is where most first-time builders lose charms or end up with a lopsided layout.
- Lay out all charms in your planned order on a flat, light-colored surface (a folded white cloth works well).
- Photograph the layout from directly above. This is your reference image if anything shifts.
- Check compatibility: confirm each charm’s bail loop fits the jump ring size you have chosen. If a bail is too narrow, swap to a smaller jump ring before you start.
- Clasp the bracelet around a cylindrical object (a marker or pill bottle) so it holds its shape while you work.
- Attach the focal charm first at the center front link, using the two-plier twist technique described above.
- Work outward symmetrically, attaching one charm to the left of center, then one to the right, alternating until all charms are placed.
- For split rings: use split-ring pliers to open the coil, thread the chain link and charm bail together, then release.
- Pull test: grip each charm gently and tug. Any charm that moves at the seam needs the jump ring closed more firmly or replaced.
- Visual inspection: check every closure under good light. A gap you can see is a gap that will catch on fabric and open further.
- Polish the chain with a soft cloth, wipe each charm gently, and clasp the bracelet closed.
- Store flat in a soft pouch until you are ready to wear it.
Pro Tip: Photograph the layout before you attach anything. If a charm slips or you change your mind mid-assembly, that photo restores your intended order in seconds.
How do you measure your wrist and choose the right bracelet length?
A bracelet sized for your bare wrist will feel tight once charms add bulk. The two-finger rule is the standard fit check: after clasping the bracelet, you should be able to slide two fingers comfortably under the chain. One finger means it is too snug; three fingers means it will slide off.
How to measure: wrap a flexible tape measure or a strip of paper around your wrist just below the wrist bone. Note the circumference, then add the appropriate allowance from the table below.
| Wrist circumference | Recommended bracelet length | Notes |
|---|---|---|
| 7–7.5 inches | 7–7.5 inches | Petite fit; add ½ inch for heavy charm clusters |
| 7–7.5 inches | 7–7.5 inches | Standard fit; most ready-made bracelets target this range |
| 7–7.5 inches | 7.5–8 inches | Relaxed fit; standard for charm-heavy builds |
| 7–7.5 inches | 8 inches | Larger wrist; confirm clasp can reach comfortably |
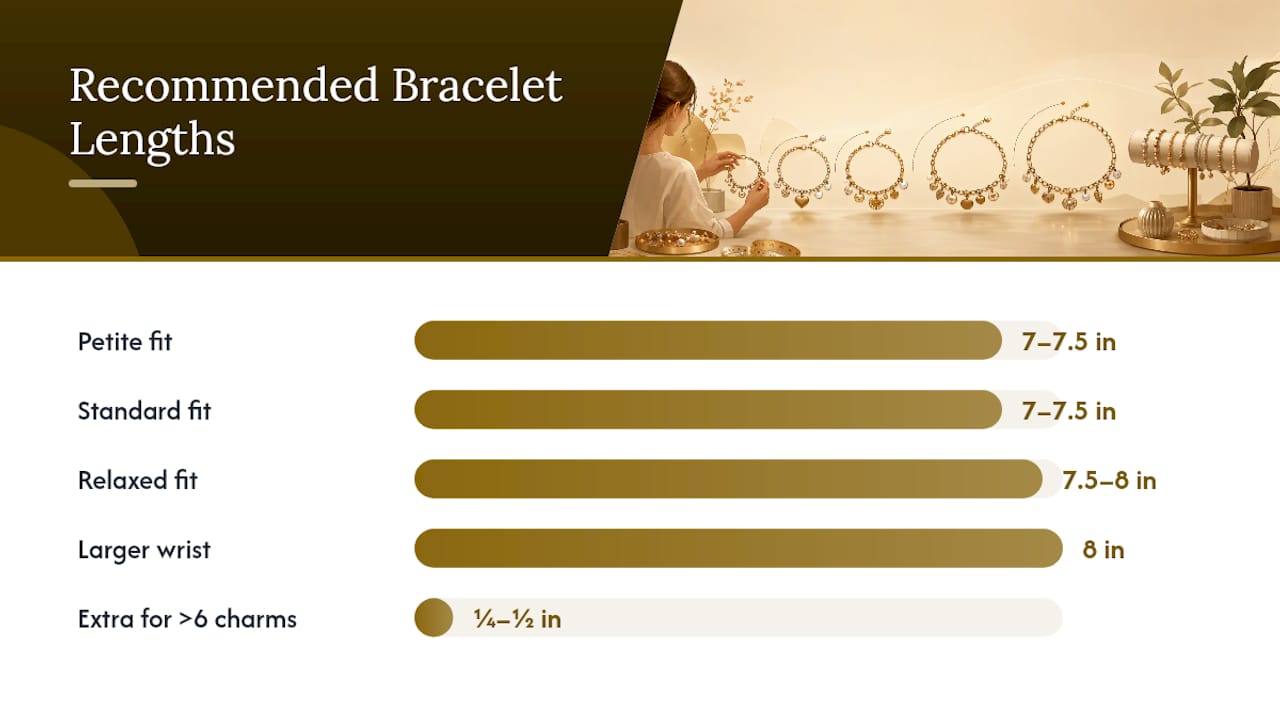
Pro Tip: If you plan to add more than six charms, add an extra ¼–½ inch to your target length. Charm bulk raises the chain off the wrist and effectively tightens the fit, especially with larger or three-dimensional charms.
How do you care for a charm bracelet over time?
Routine care keeps the chain strong and the charms looking as good as the day you attached them.
Daily habits:
- Put the bracelet on after applying lotion, perfume, and hairspray. These products accelerate tarnish and can cloud gemstone surfaces.
- Remove it before swimming, showering, or doing dishes. Chlorine degrades sterling silver and gold vermeil faster than almost anything else.
- Wipe the chain and charms with a soft polishing cloth at the end of the day.
Storage:
- Keep the bracelet in a soft pouch or a lined jewelry box compartment. Loose storage lets charms scratch each other and the chain.
- Store sterling silver pieces separately from gold when possible; prolonged contact between different metals can cause surface transfer marks.
- Lay the bracelet flat rather than coiling it tightly, which stresses jump ring closures over time.
When to see a jeweler:
- Any jump ring that feels loose or has a visible gap
- A charm bail that has stretched or cracked
- A gemstone setting that rocks when you press it gently
- Any attachment on an irreplaceable charm that you want soldered permanently
For gemstone charm care, the specific stone matters: pearls, opals, and turquoise are porous and need gentler handling than sapphires or diamonds.
What do experienced jewelers recommend for heirloom-quality results?
The difference between a bracelet that lasts five years and one that lasts fifty usually comes down to three decisions made at the start.
- Choose a heavier base chain than you think you need. A curb or oval-link chain in a 3–5 mm width holds its shape as charm weight accumulates. A fine cable chain that looks elegant with three charms often distorts with eight.
- Keep your finish families consistent. High-polish gold with high-polish gold, brushed silver with brushed silver. Mixing finishes within the same metal family reads as careless rather than eclectic.
- Test balance on a flat surface before finalizing placement. Redistribute heavy charms toward the center front. A bracelet that sits unevenly on a table will twist on the wrist.
For truly irreplaceable charms, have the attachment soldered by a jeweler. DIY jump ring closures are reliable for everyday pieces, but a hand-soldered loop is the only closure that genuinely cannot open accidentally.
A deliberate, slow curation approach, starting with a few deeply meaningful pieces and adding only charms that earn their place, consistently produces bracelets that become cherished keepsakes rather than impulse collections that feel dated within a year.
The Sayers London guide to building charm bracelets echoes this: a single meaningful charm on a quality starter bracelet is a stronger foundation than a fully loaded chain assembled in one afternoon.
Why storytelling matters more than the charms themselves
There is something quietly powerful about a bracelet that requires explanation. Not because it is complicated, but because each charm points to something real: a place you stood, a person you love, a moment that changed you. That is what separates a charm bracelet from other jewelry. A ring is worn; a charm bracelet is read.
The temptation is to fill the chain quickly. Resist it. Let each charm earn its place by representing something you would actually want to talk about twenty years from now. A bracelet built over a decade, one charm at a time, carries a kind of weight that no fully assembled piece can replicate. Slow collecting is not a limitation. It is the whole point.
Ready for a custom charm bracelet made to last a lifetime?
When you have designed your story and know exactly what you want, the next step is finding a maker who can bring it to life with the quality it deserves. Usajewels has been crafting fine jewelry in-house since 1999, with a family-owned manufacturing model that keeps prices direct and quality high. Every piece is made with ethically sourced materials, and our team works with you to match your vision, from metal choice to charm design.
Whether you are starting with a single meaningful charm or commissioning a fully designed bracelet, our fine jewelry collections give you the craftsmanship and personalization that a bracelet meant to last generations deserves. Browse our jewelry collections or reach out directly to start designing yours today.
Sources
- The Art of Building Charm Bracelets | Jewelers Mutual Group
- How to Make a Charm Bracelet
- The Charm Style Guide: How to Design & Style Charm Jewelry – Atlanta Findings
- How to Build a Charm Bracelet: Meanings, Milestones & Where to Start | Sayers London
- How to Design the Perfect Charm Bracelet – First Class Watches Blog
FAQ
What is the two-finger rule for bracelets?
After clasping your bracelet, slide two fingers under the chain. If they fit comfortably, the fit is correct. One finger means too tight; three fingers means too loose.
How many charms should you have on a charm bracelet?
Start with 3–6 charms. That count creates immediate visual interest without overcrowding the chain, and it leaves space to add charms as your story grows.
Are charm bracelets still in style in 2026?
Yes. Personalized and sentimental jewelry has remained strong, with charm bracelets specifically valued for their storytelling quality and the ability to customize them over time.
What makes a charm bracelet truly meaningful?
A charm bracelet becomes meaningful when each charm represents a specific person, place, or moment rather than a general aesthetic. Choosing a theme before you shop, as described in this guide, is the most reliable way to build that kind of coherence.
Recommended
- Bracelet Collections: Tennis & Gold | USA Jewels
- Bangle Bracelets, Fine Jewelry Artistry | USA Jewels
- Gemstone Bracelets | Fine Jewelry | USA Jewels
- Custom Jewelry Gift Surprise Planning: Your 2026 Guide

Deep Mehta is the Co-Owner of USA Jewels, a family-owned jewelry business she has led since 2013 in Deerfield Beach, Florida. With over 13 years of hands-on experience in fine jewelry retail, manufacturing, and diamond importing, Deep specializes in engagement rings, wedding bands, and custom jewelry design. She also co-manages Kaash Group Talent Acquisition. Deep is a University of Florida graduate and oversees every aspect of USA Jewels’ operations, from product development to marketing.
Fine Jewelry Collection


You May Also Like

Why Handcrafted Jewelry Costs Differ: A Buyer’s Guide
How to Stack Bracelets: A Guide